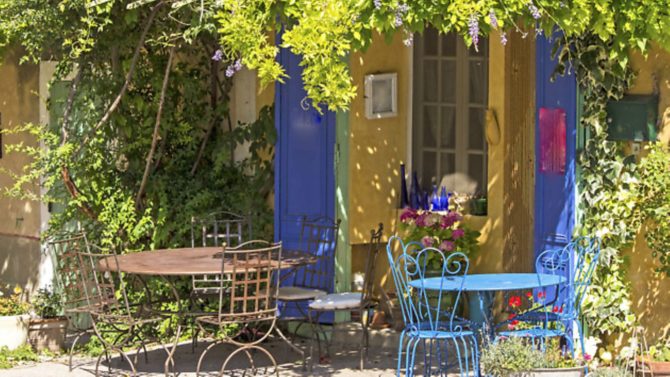
Upcycling: a shabby chic look for your French home

Want that vintage French look for your new French home? Jessica Carter explores some simple upcycling techniques that could give your old furniture a new lease of life
You may be nicely settled into your French property now, but perhaps your old furniture doesn’t feel as at home in its new surroundings as you do.
Or maybe some of your pieces are just looking a little bit tired – especially after being lugged all the way across the Channel to their new home.
At the same time, it’s likely that you have forked out enough for the move itself without having to refurnish an entire house, and anyway, what you have is perfectly good quality and in fine working order. Why swap it all for some flimsy flat-pack pieces, just because they’d go with the colour scheme? Either way, the fate of your old furniture need not be decided by any of these factors. You can easily make it new again with a little ingenuity and a touch of imagination.
Upcycling is taking something that’s maybe a bit old, a little uninspiring or for whatever reason has become sadly redundant, and giving it a new lease of life and a new purpose.
You may now be thinking of the upcycling programmes you’ve seen on telly – the ones where a rusty supermarket trolley is turned into a statement chair, or an old door is transformed into a fancy dining room table – and thinking that this is way out of your crafty comfort zone. But repurposing your old furniture needn’t be as drastic as all that; a lick of paint here or a stitch or two there and you can fall in love with that old dresser all over again.
The term upcycling may be a relatively new one, but the concept has been around for generations. Around the time of World War II when people struggled to feed themselves let alone buy new furniture, clothes or other household items, families used to find ways to make the most out of what they had, finding practical uses for things that were readily available. This may well be one of the reasons that upcycling is currently so popular; vintage is very much in vogue at the moment and upcycling lends itself perfectly to this whole retro trend.
It’s not often that you come across a fashion movement that’s even relatively affordable, let alone money saving, which helps explain why it has taken off to such an extent.
Not only does upcycling help save money though – in a small way it helps save Mother Earth too. Upcycling limits the amount of waste being continually poured into already out-of-control landfills. At the moment, England alone produces 177 million tonnes of waste every single year, much of which then sits on landfill sites producing methane, a nasty gas that causes damage to the ozone layer. This is one reason why recycling efforts have been ramped up of late.
However, upcycling goes one step further than recycling – it doesn’t require nearly the same level of energy or resource that’s involved in gathering, sorting and breaking down the various materials, then using them to manufacture something new. The only emissions you’re going to produce when upcycling is your own steam.
If you’ve never done it before, it may feel a little scary when you first take a piece of sandpaper to a coffee table or paintbrush to a chair, but be brave. With a little know-how and a bit of practice you can really master the art of upcycling. And who knows – you might even enjoy it.
You could probably find a use for most household items that you regularly throw away. For instance, wine bottles make lovely candle holders, old tyres are great for planting potatoes in, and newspapers, well, they come in handy for découpage.
DÉCOUPAGE
This is a relatively straightforward technique for completely overhauling a piece of furniture and giving it an entirely new look. It’s basically covering furniture with paper – think papier mâché for grown-ups. And it doesn’t have to be newspaper that you use either; old maps look great, as do pages from books, comics, sheets of music, maps and wallpaper.
If you fancy giving it a go, then you’ll need to start by sanding down the surfaces you’re going to cover. This doesn’t need to be particularly vigorous, it’s just to get a good coarse surface to work with. Then get your paper ready; you can use sheets whole, cut them into shapes or tear them into strips, depending on what kind of finished effect you have in mind.
Then get your adhesive ready – good old PVA glue with water – and arm yourself with a paint brush. Apply the glue to the surface, sticking on the paper as you go. Once you’ve made sure you’ve completely covered all the desired parts and haven’t left any pesky gaps, leave it to dry. Finally, seal it with a good few coats of varnish, letting each coat dry before applying the next one.
CHALK PAINTING
Again, this technique is a real all-rounder; you can easily update anything from cupboard doors to chairs to photo frames with a lick of paint and a bit of know-how.
People often get put off painting furniture because of all that tedious preparation: filling out chips with wood filler, sanding down all the surfaces, priming the wood: that’s the afternoon gone before you’ve even opened your paint pot. Luckily though, there is a way to get out of having to do this prep, meaning you can pretty much get stuck into the fun bit straight away.
Chalk paint is every upcycler’s best friend. It’s super easy to work with and there’s no need to get different kinds for different surfaces – the same pot will work on wood, metal and plastic, and it’s suitable for both indoor and outdoor use. This paint also makes all that tiresome prep happily redundant as it will stick no matter what’s underneath.
If you’d like to go for the popular shabby chic look, then this stuff is right up your street. First, choose two colours – one main colour (the colour you actually want the piece to be) and one to go underneath. This second shade will show through on the parts that you scuff later to give that lovely worn look. Have fun with the colours here but stay within reason, as you want them to be complementary. A popular technique is to go for a slightly darker shade of the main colour for the undercoat.
If your piece has really been in the wars, you might want to treat it to some light sanding just to smooth down the surfaces before painting your undercoat. If you know where you’ll be scuffing it later you can just concentrate on those patches to save on paint. There’s no harm in doing the whole thing if you’re still undecided about the specifics at this stage, but this is not the cheapest of paints so you may want to make it last.
Once the first layer is totally dry, you can get cracking with your second coat. If you’re feeling adventurous, you might want to give extra thought to the different paint effects and brush strokes that you use, but it’s by no means necessary. Once that second coat is dry, seal with wax.
Now it’s time to get creative. Grab some sandpaper and, very gently, begin to scuff patches of paint to reveal the shade underneath. Don’t be too heavy handed though – you don’t want to go right through to the surface. If you want a naturally distressed look then concentrate on corners, raised edges and areas that are generally handled a lot – all the places where the finish would naturally wear off over time. Then another layer of wax is in order, and this is really important for preserving the look and protecting the surface.
REUPHOLSTERING
Reupholstering a three-piece suite may be a little too optimistic for some of us, but I’m confident that even those who have never come within 10 feet of a sewing machine can manage to reupholster your average wooden chair.
First, you’ll need to select the fabric for your seat and get your hands on a loaded staple gun. With tools assembled, remove the seat from the frame.
Place the seat – soft side down – on your new fabric and cut around it, leaving a good few inches on every side. Fold each side of the fabric over the back of the seat, one by one, stapling as you go. Make sure you pull the fabric as tight as possible, especially at the corners where there will be a fold.
Then, if you wish, you can add a trimming. This could be a fabric trim that’s either sewed or glued on, or nail heads that are hammered in around the edges. Once you’re happy, replace the seat in the frame et voilà!
You can use these neat upcycling tricks to achieve whatever style you like, be it rustic French country charm or urban city chic. Have fun and be creative – you may well surprise yourself at how much you can achieve with pretty minimal effort.
Share to: Facebook Twitter LinkedIn Email


